How to Send Custom Emails from Netlify: A Step-by-Step Guide
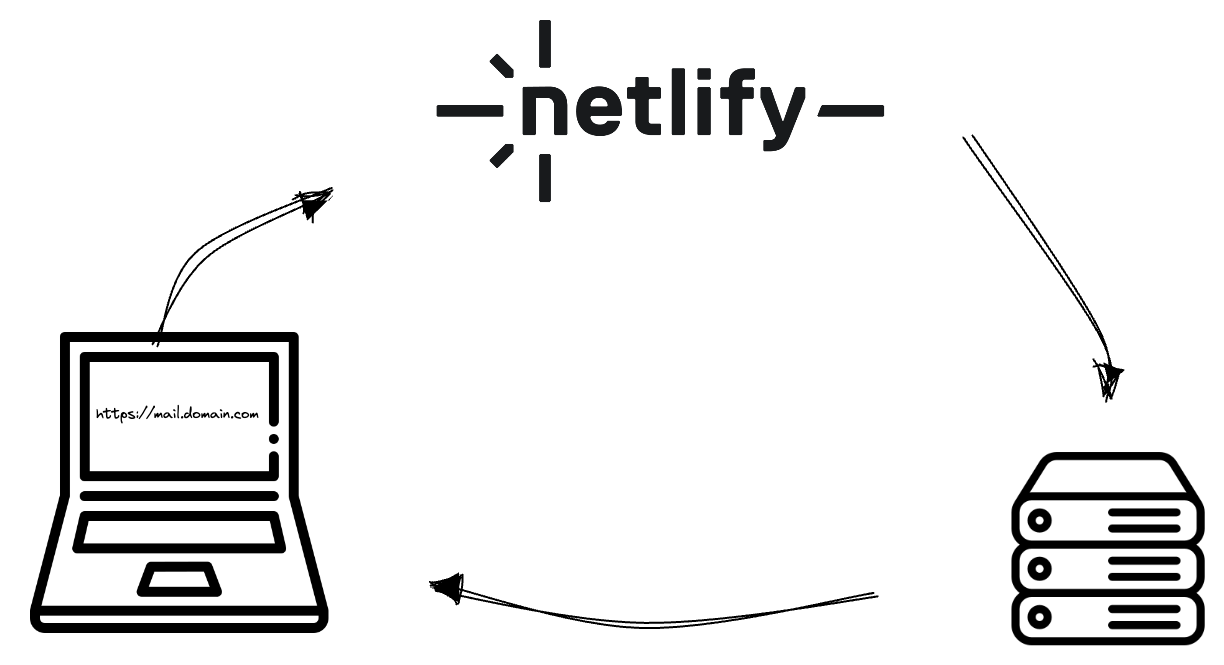
This article explains how to send custom emails from shared hosting while your site is hosted on Netlify.
Imagine this scenario: you have a website hosted on Netlify and want to send custom emails using your domain name, e.g., yourname@domain.com, so you purchased a shared hosting plan that gives you domain-based mailboxes for sending and receiving emails.
Why would you deploy your website on Netlify instead of your shared hosting plan? Well, they're both hosting providers for deploying modern frontend applications such as React and Vue, and they provide you with benefits such as automatic SSL, serverless functions, continuous deployment using git, and lots more. This article gives you a workaround to enjoy the best of both worlds.
Prerequisites
To begin, you need the following:
A free or Netlify account where you hosted your website
A domain name linked to your website
A hosting (shared or full access) plan that provides you with custom emails and Cpanel access.
With these, you're good to go.
Step 1: IP Address
Login to your Cpanel dashboard on your hosting and get the IP address assigned to your server.

Step 2: Email Server Address
To create and access your email details, go to the email section of your cPanel. Here is a guide on how to create emails and retrieve the details. Below is a screenshot of the details you need.
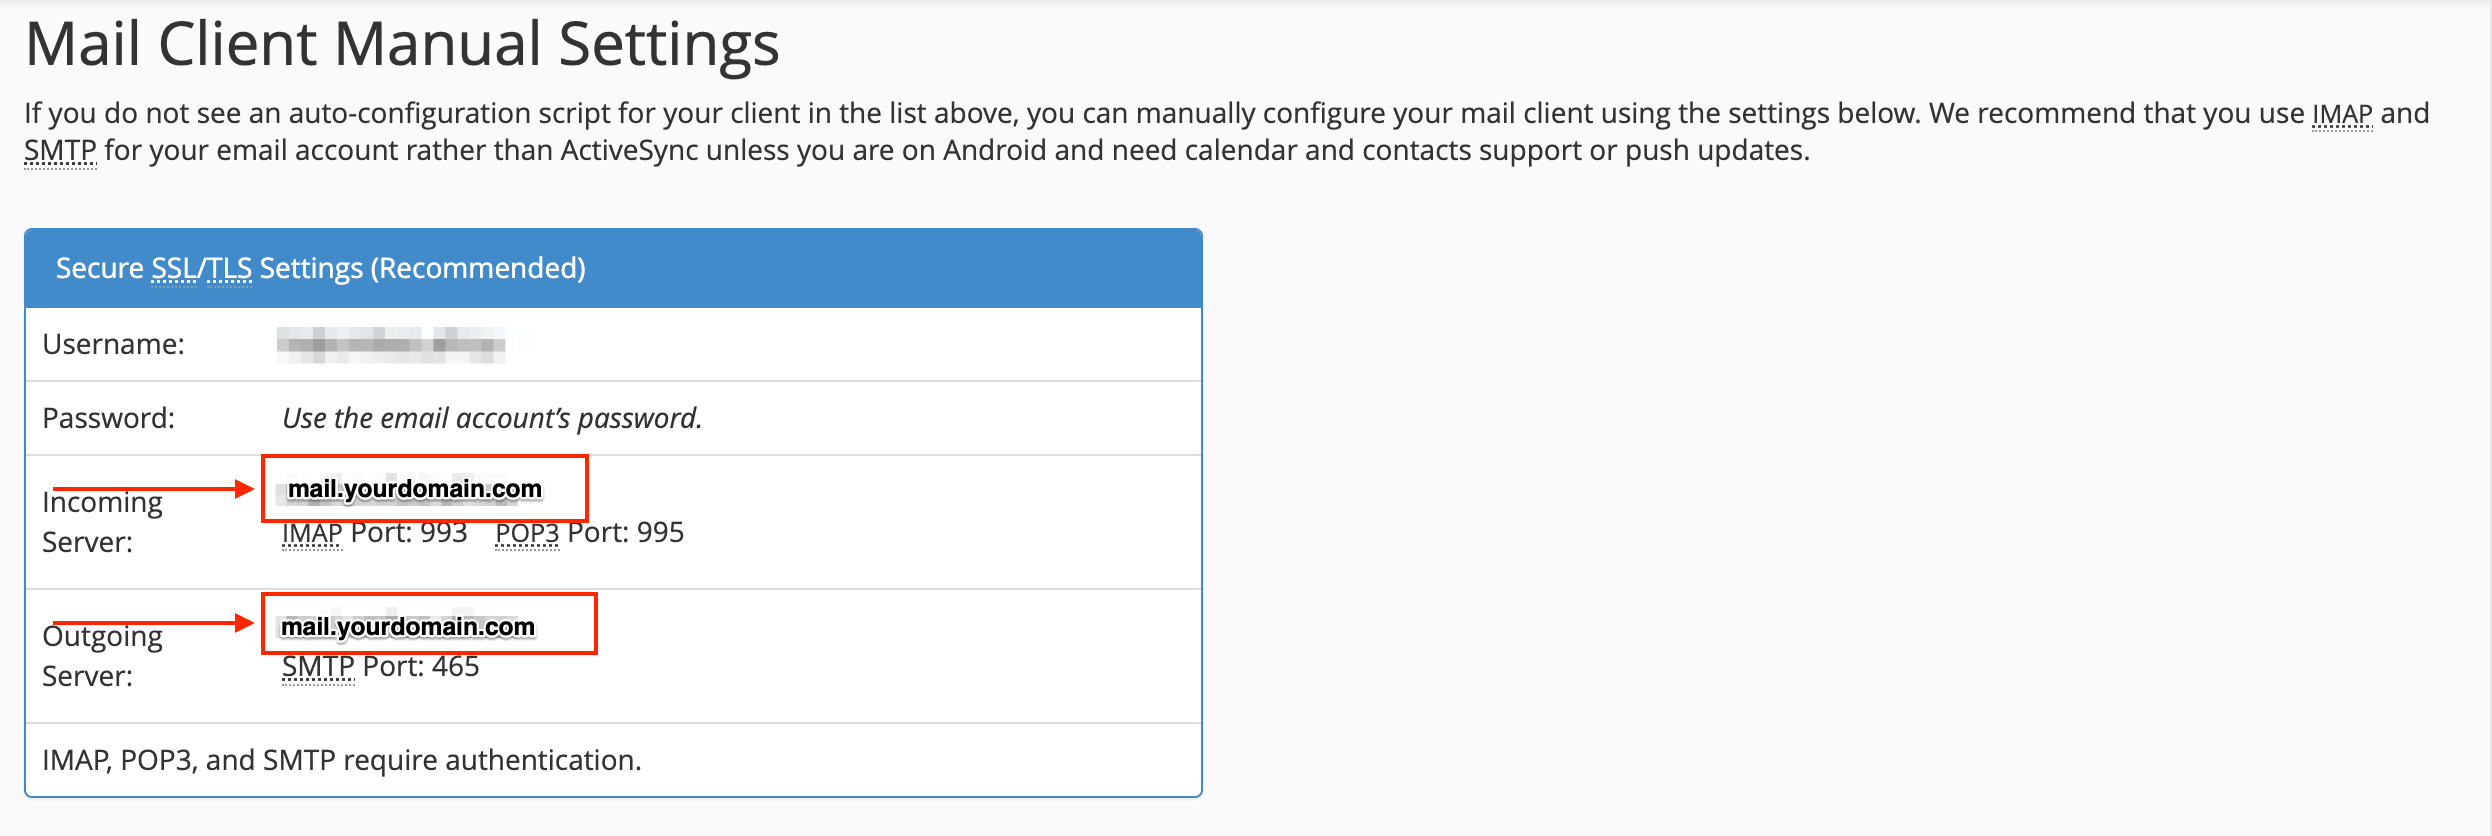
So far, here are the details you've gathered from the shared host server:
IP Address
Email server address
These two items are essential for ensuring emails are sent from the shared hosting server.
Step 3: Configure DNS Records
Now that you have the details you need from the shared hosting, you need to add those details to Netlify so that your emails can go through whenever you try sending an email.
You can find a step-by-step guide on deploying a website on Netlify here, and you can set up a custom domain here.
With those details set up, visit https://app.netlify.com/teams/team-name/dns/yourdomain.com (replacing team-name and yourdomain.com with your team name and domain name.
This shows you the DNS records for your domain.
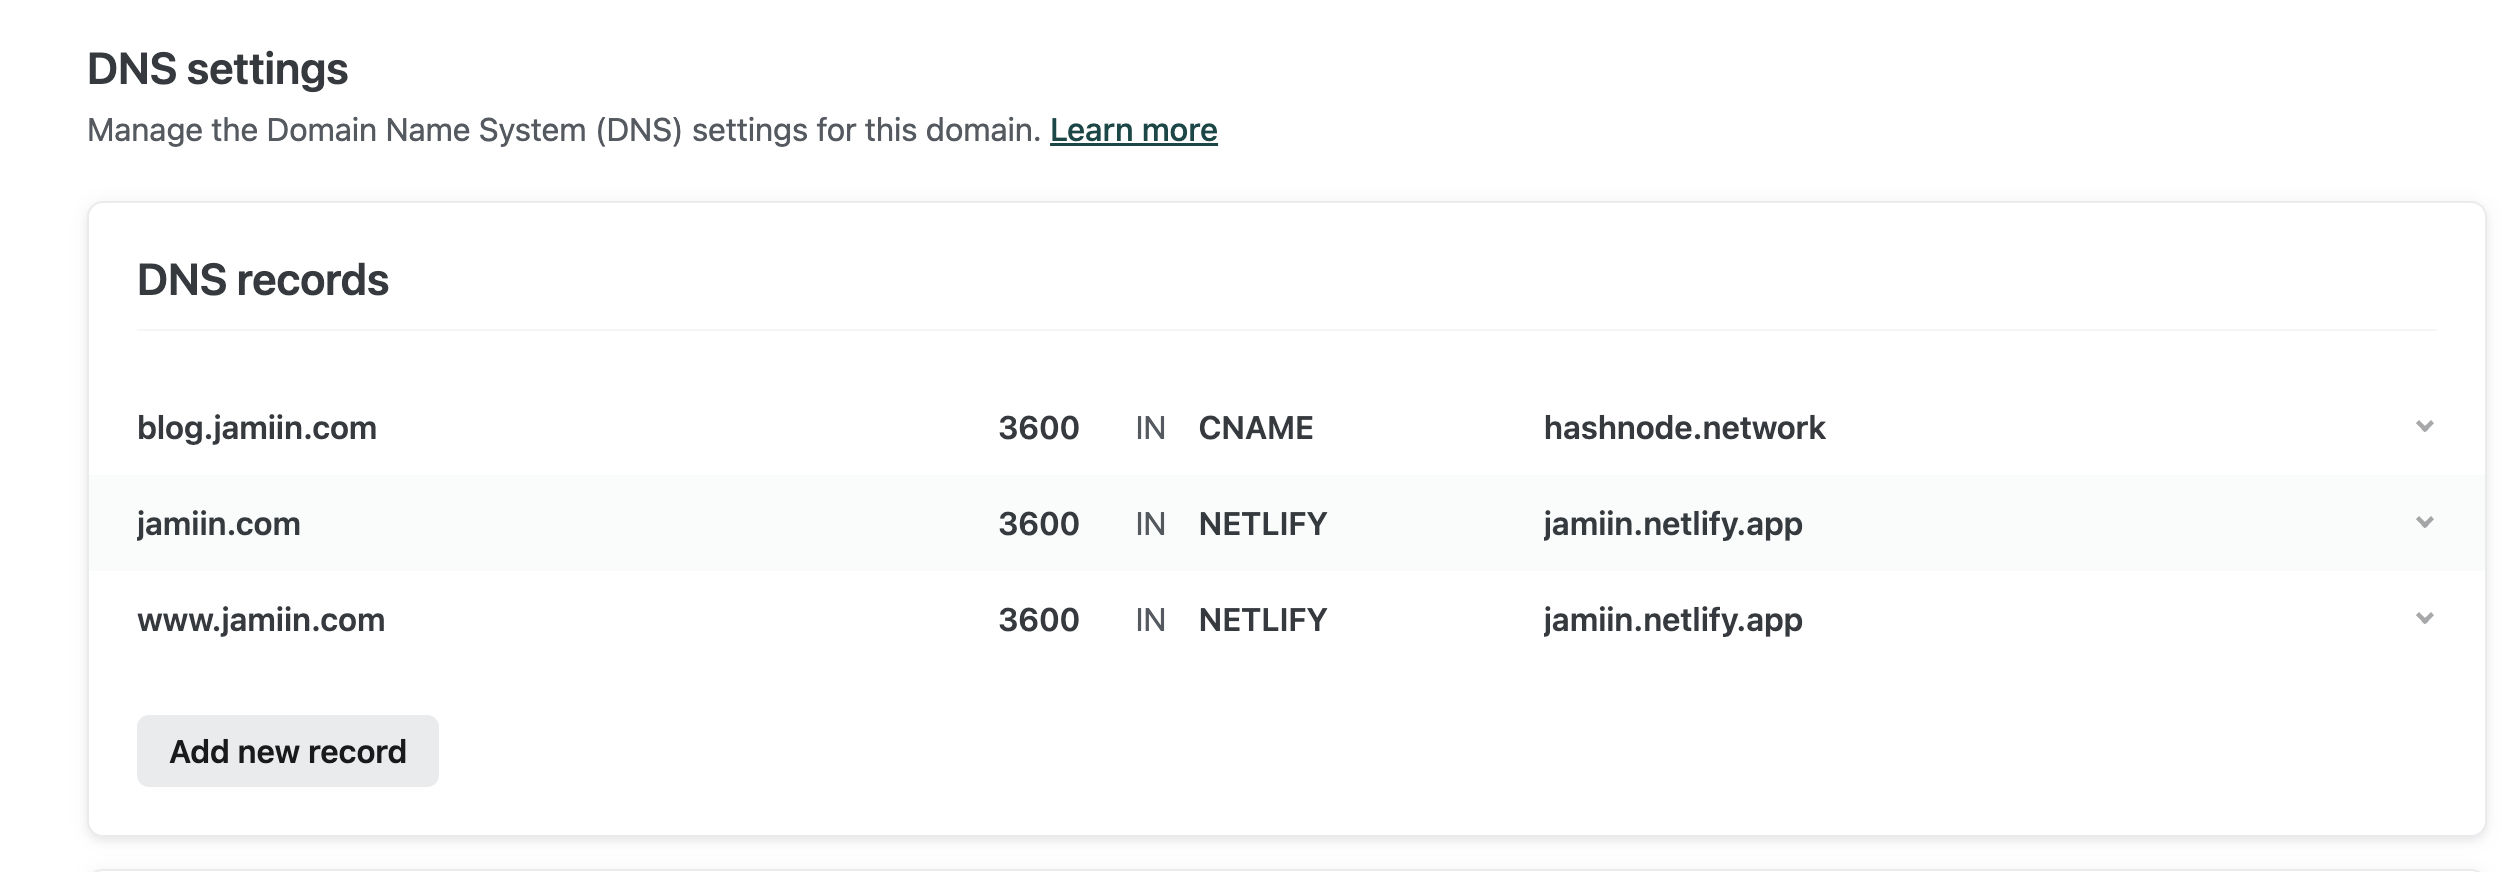
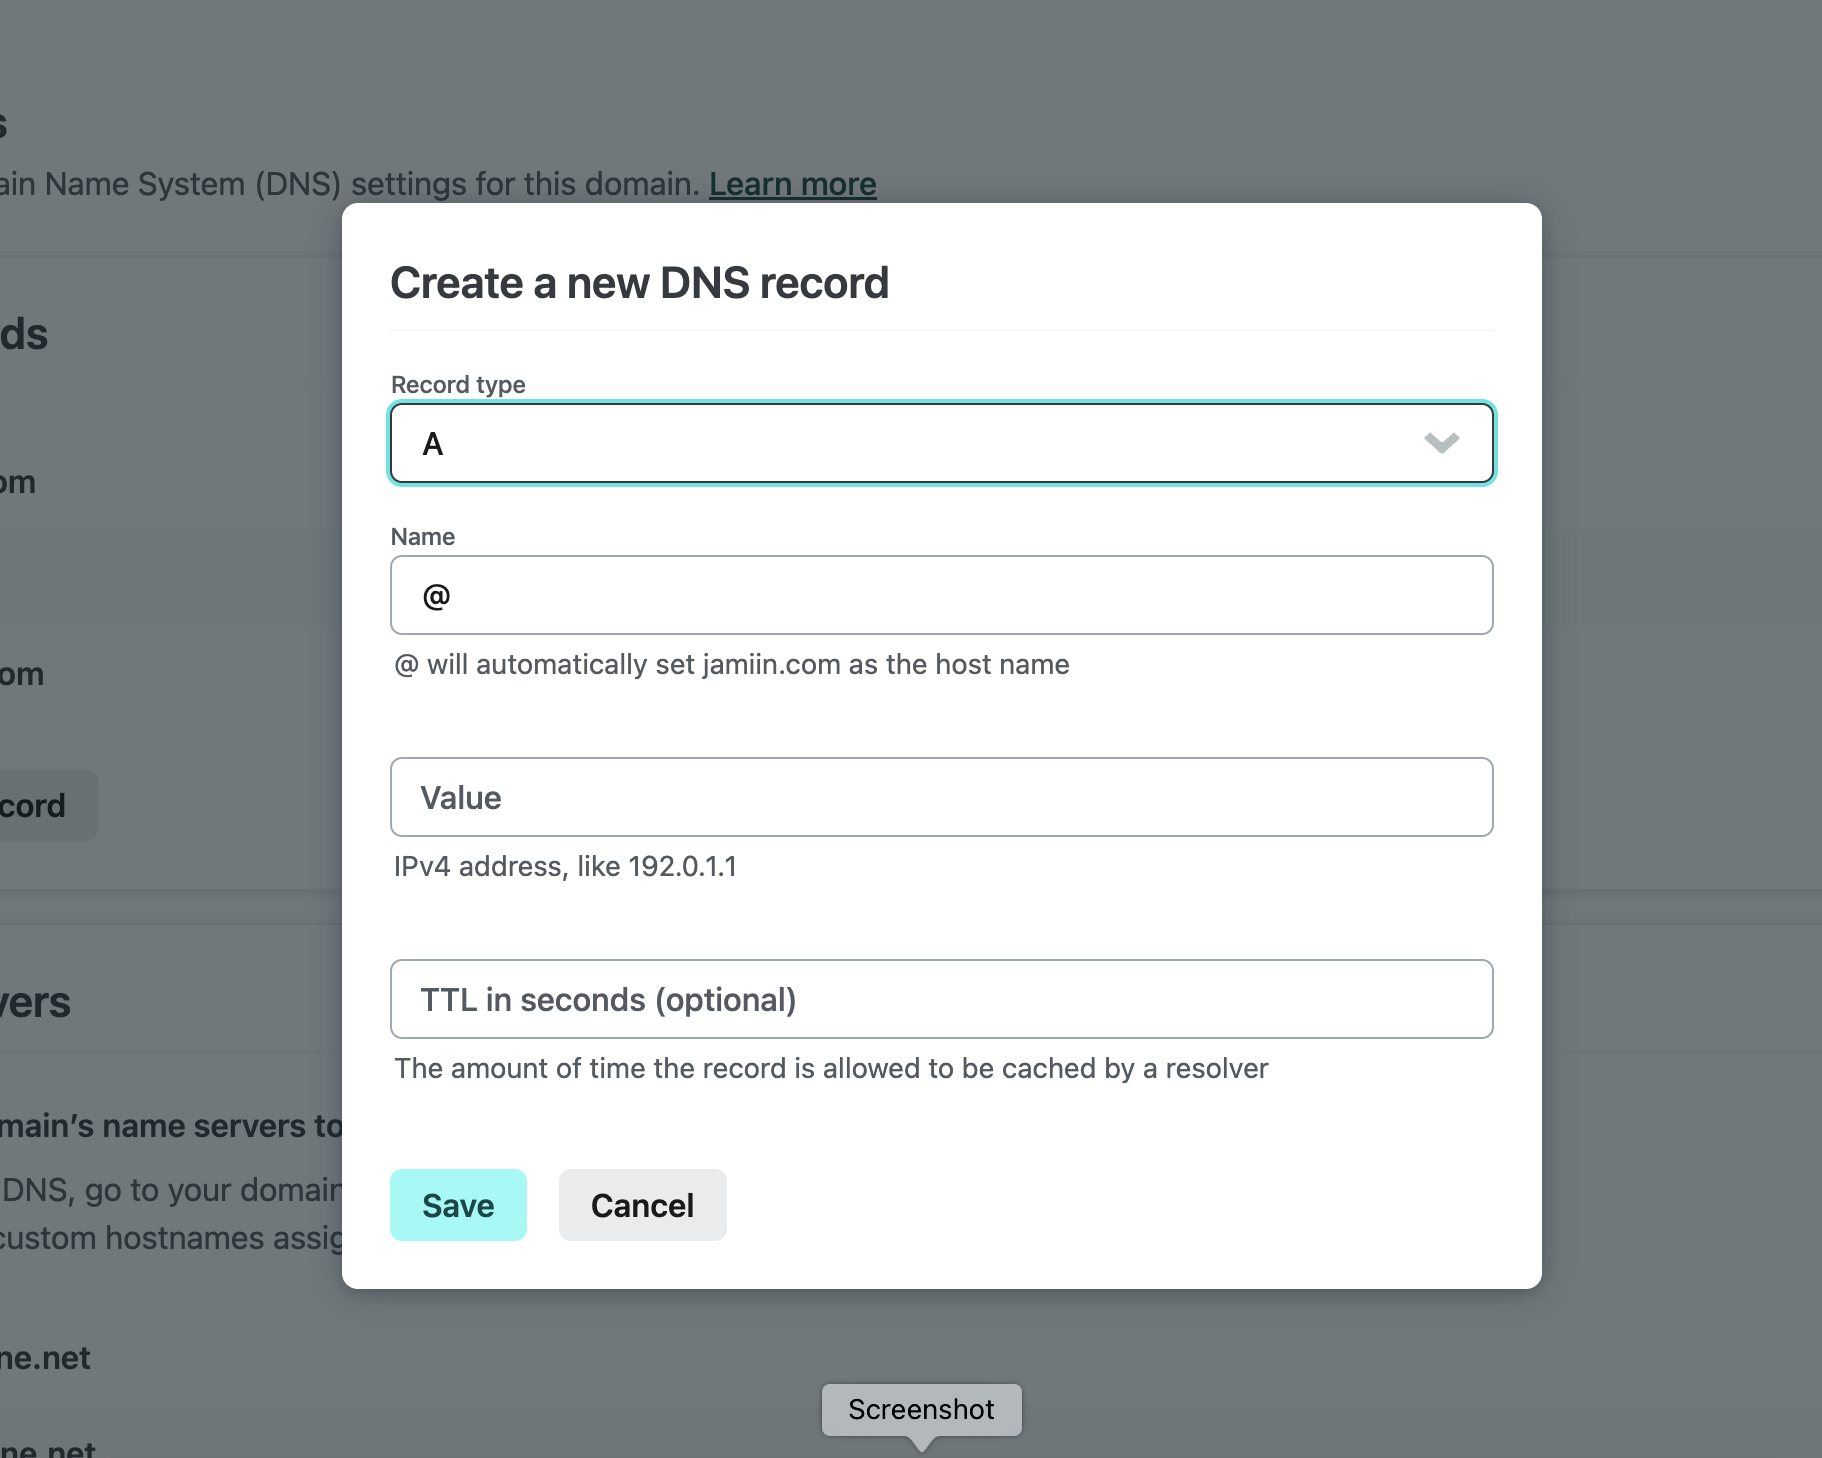
Using the same record from steps 1 and 2, click on the add new record button to update the records on Netlify with these two DNS records:
Record 1
Type: A
Name: mail.yourdomain.com (See step 2).
Value: IP address of your shared server (see step 1).
TTL: 60 (or allow to use default)
Record 2
Type: MX
Name: yourdomain.com
Value: mail.yourdomain.com
TTL: 60 (or allow to use default)
Priority: 0
DNS changes usually take 24–48 hours to reflect the changes made.
Conclusion
That's it. You've just added details from a shared host to Netlify. Here is a quick summary of what you accomplished.
Retrieved IP addresses from shared hosting
Retrieved email server details
Update the DNS records on Netlify to point to your shared hosting for sending emails.
References
I'd love to connect with you on Twitter | LinkedIn | GitHub
I hope you find this article helpful. Cheers.
About the author
Trust Jamin is a software engineer, technical writer, and developer advocate focused on building developer-first content, tools, and communities.
Comments
Join the discussionNo comments yet. Be the first to comment.