How to Deploy Directus to Render.com

Trust Jamin is a software engineer, technical writer, and developer advocate focused on building developer-first content, tools, and communities.
Directus is an open-source backend-as-a-service platform that offers a user-friendly interface that simplifies building fully functional backend services, APIs, and graphQL endpoints. This ease of use extends to Render, a fully managed cloud platform where you can effortlessly host static sites, backend APIs, databases, and all other components for your web application. In this article, you’ll learn how to deploy a self-hosted instance of Directus to Render and connect it to a PostgreSQL database.
Prerequisites
Before you begin this tutorial, you will need a Render account; the free plan is good enough to follow along with this tutorial.
Step 1: Set Up a PostgreSQL Database
On your Render account, click on the “New +” button and Click on PostgreSQL to create a new PostgreSQL database.

On the database creation page, add a name for your PostgreSQL instance, a database name, a user, and the region from which you want the PostgreSQL instance to run. Also, select “For hobby projects” as the instance type for a free tier.
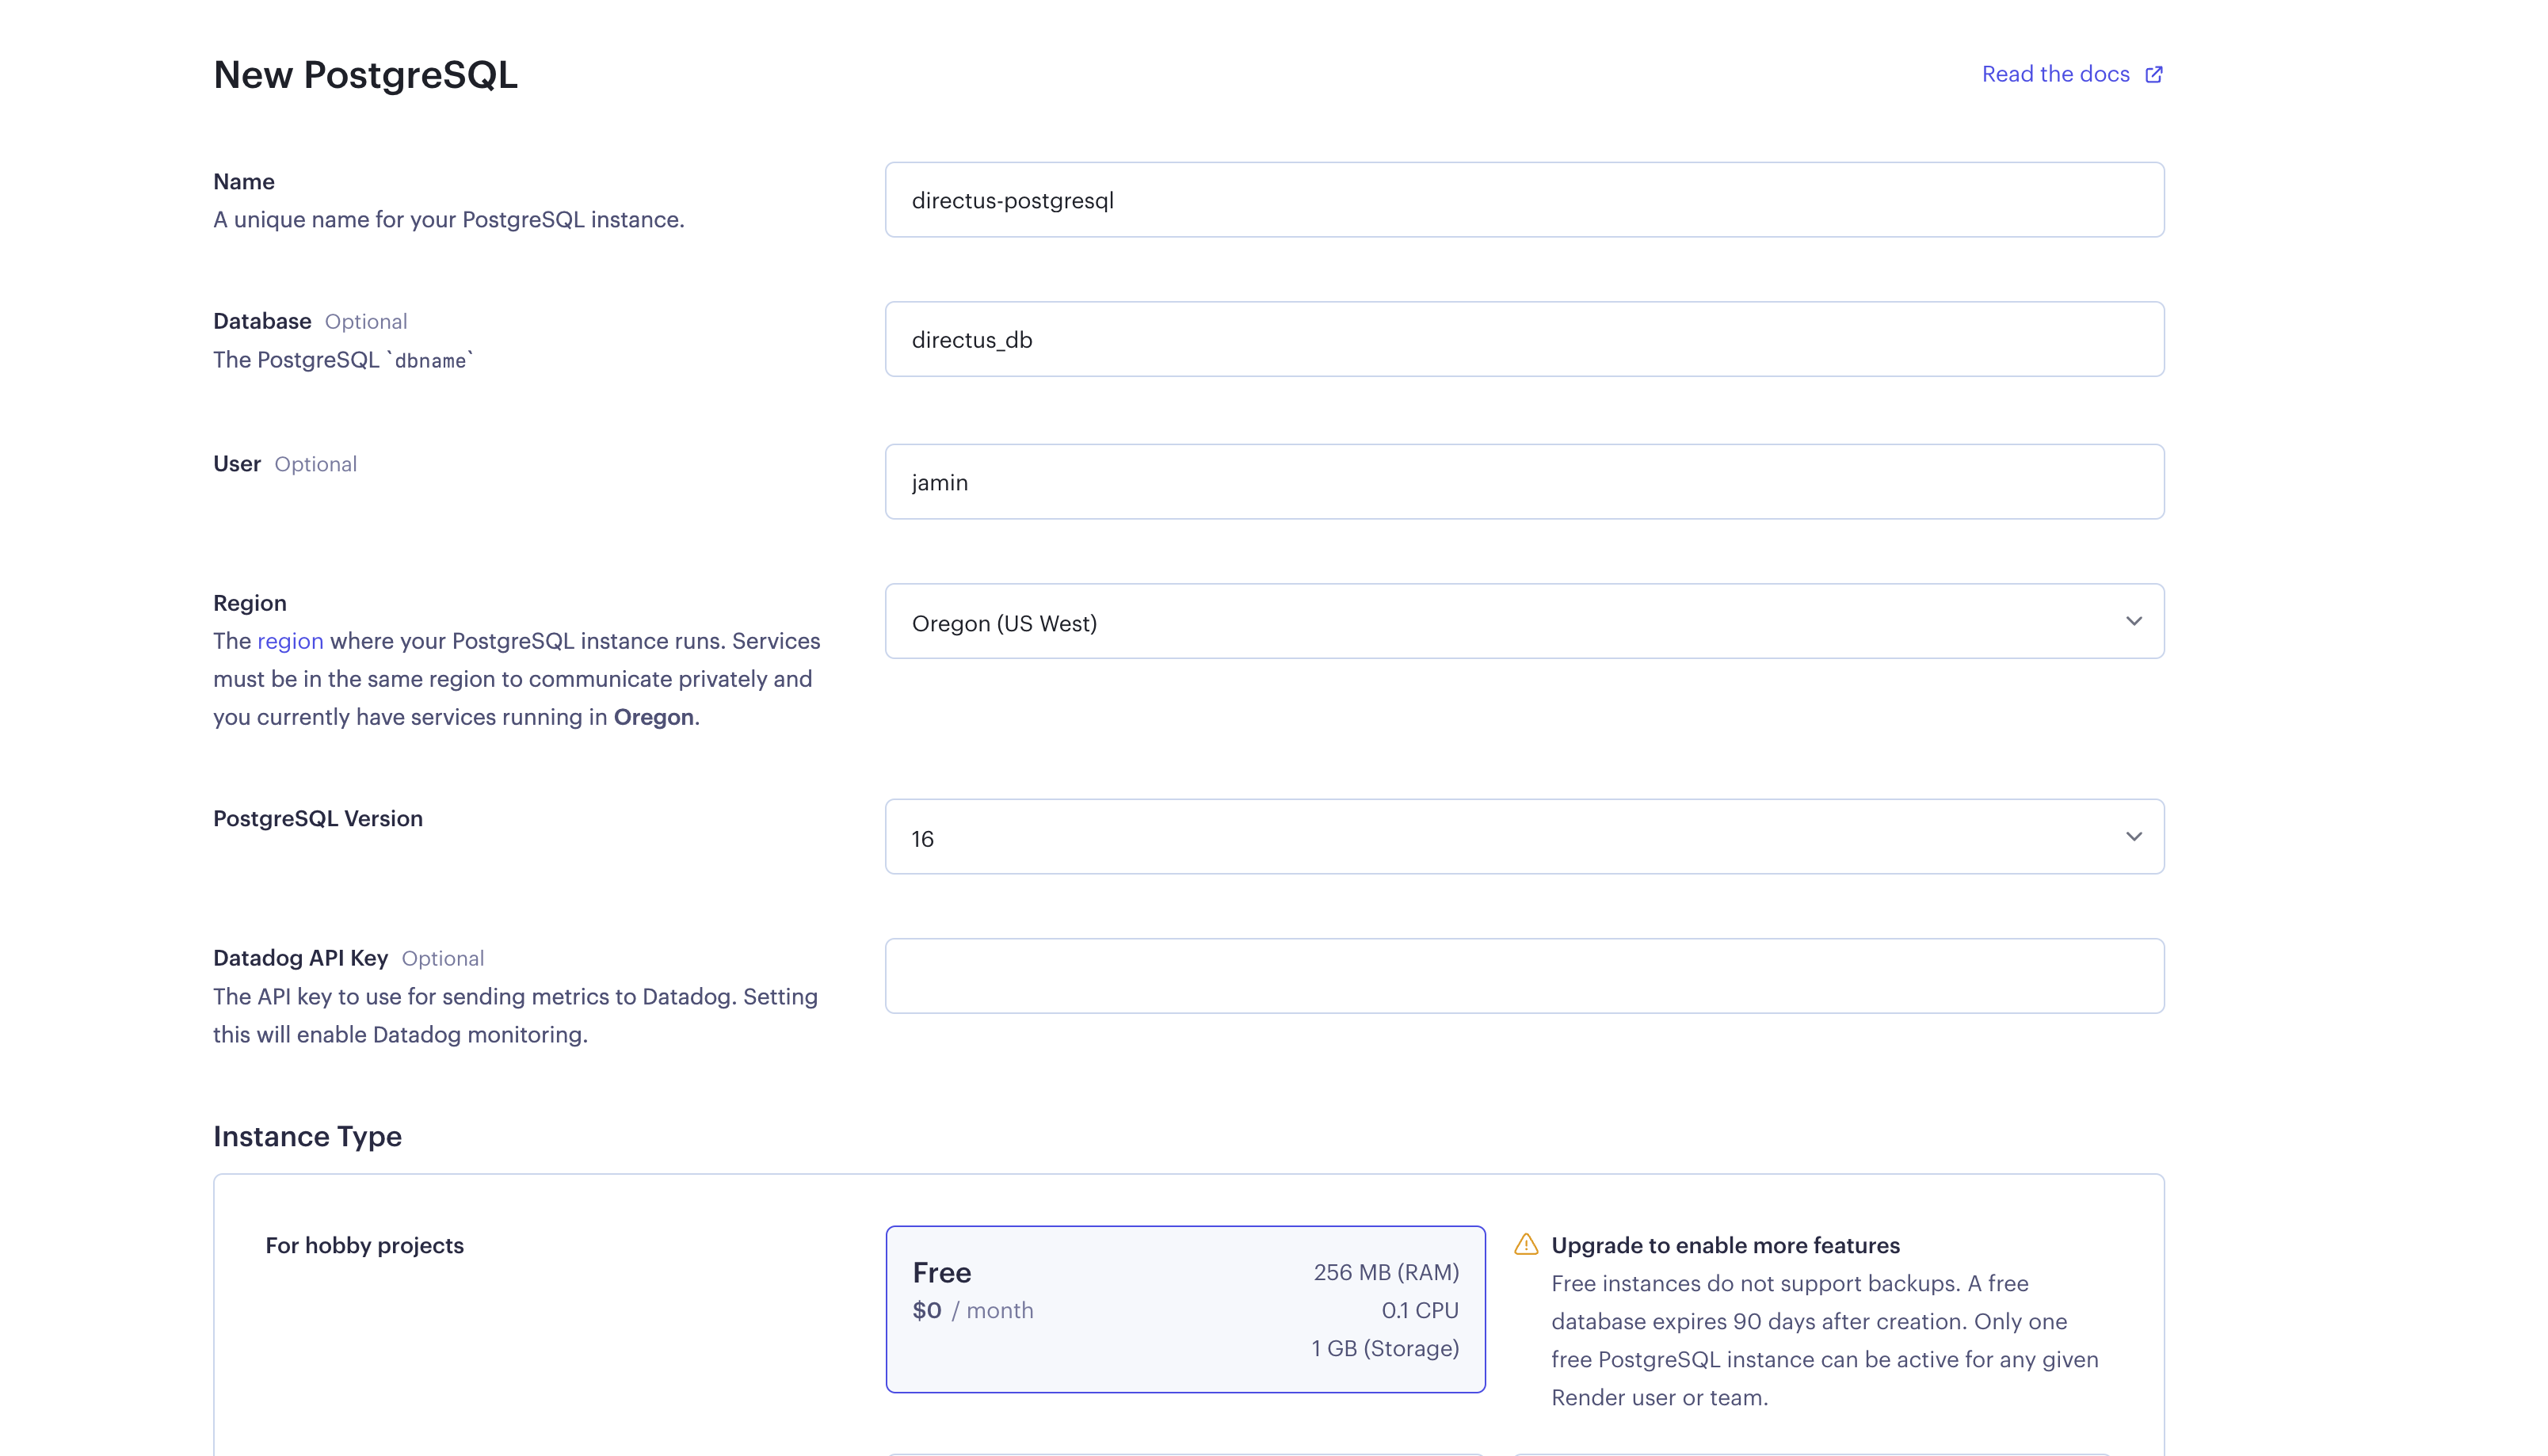
Next, click on the Create Database button to create your PostgreSQL database.
You should be redirected to the created database page.
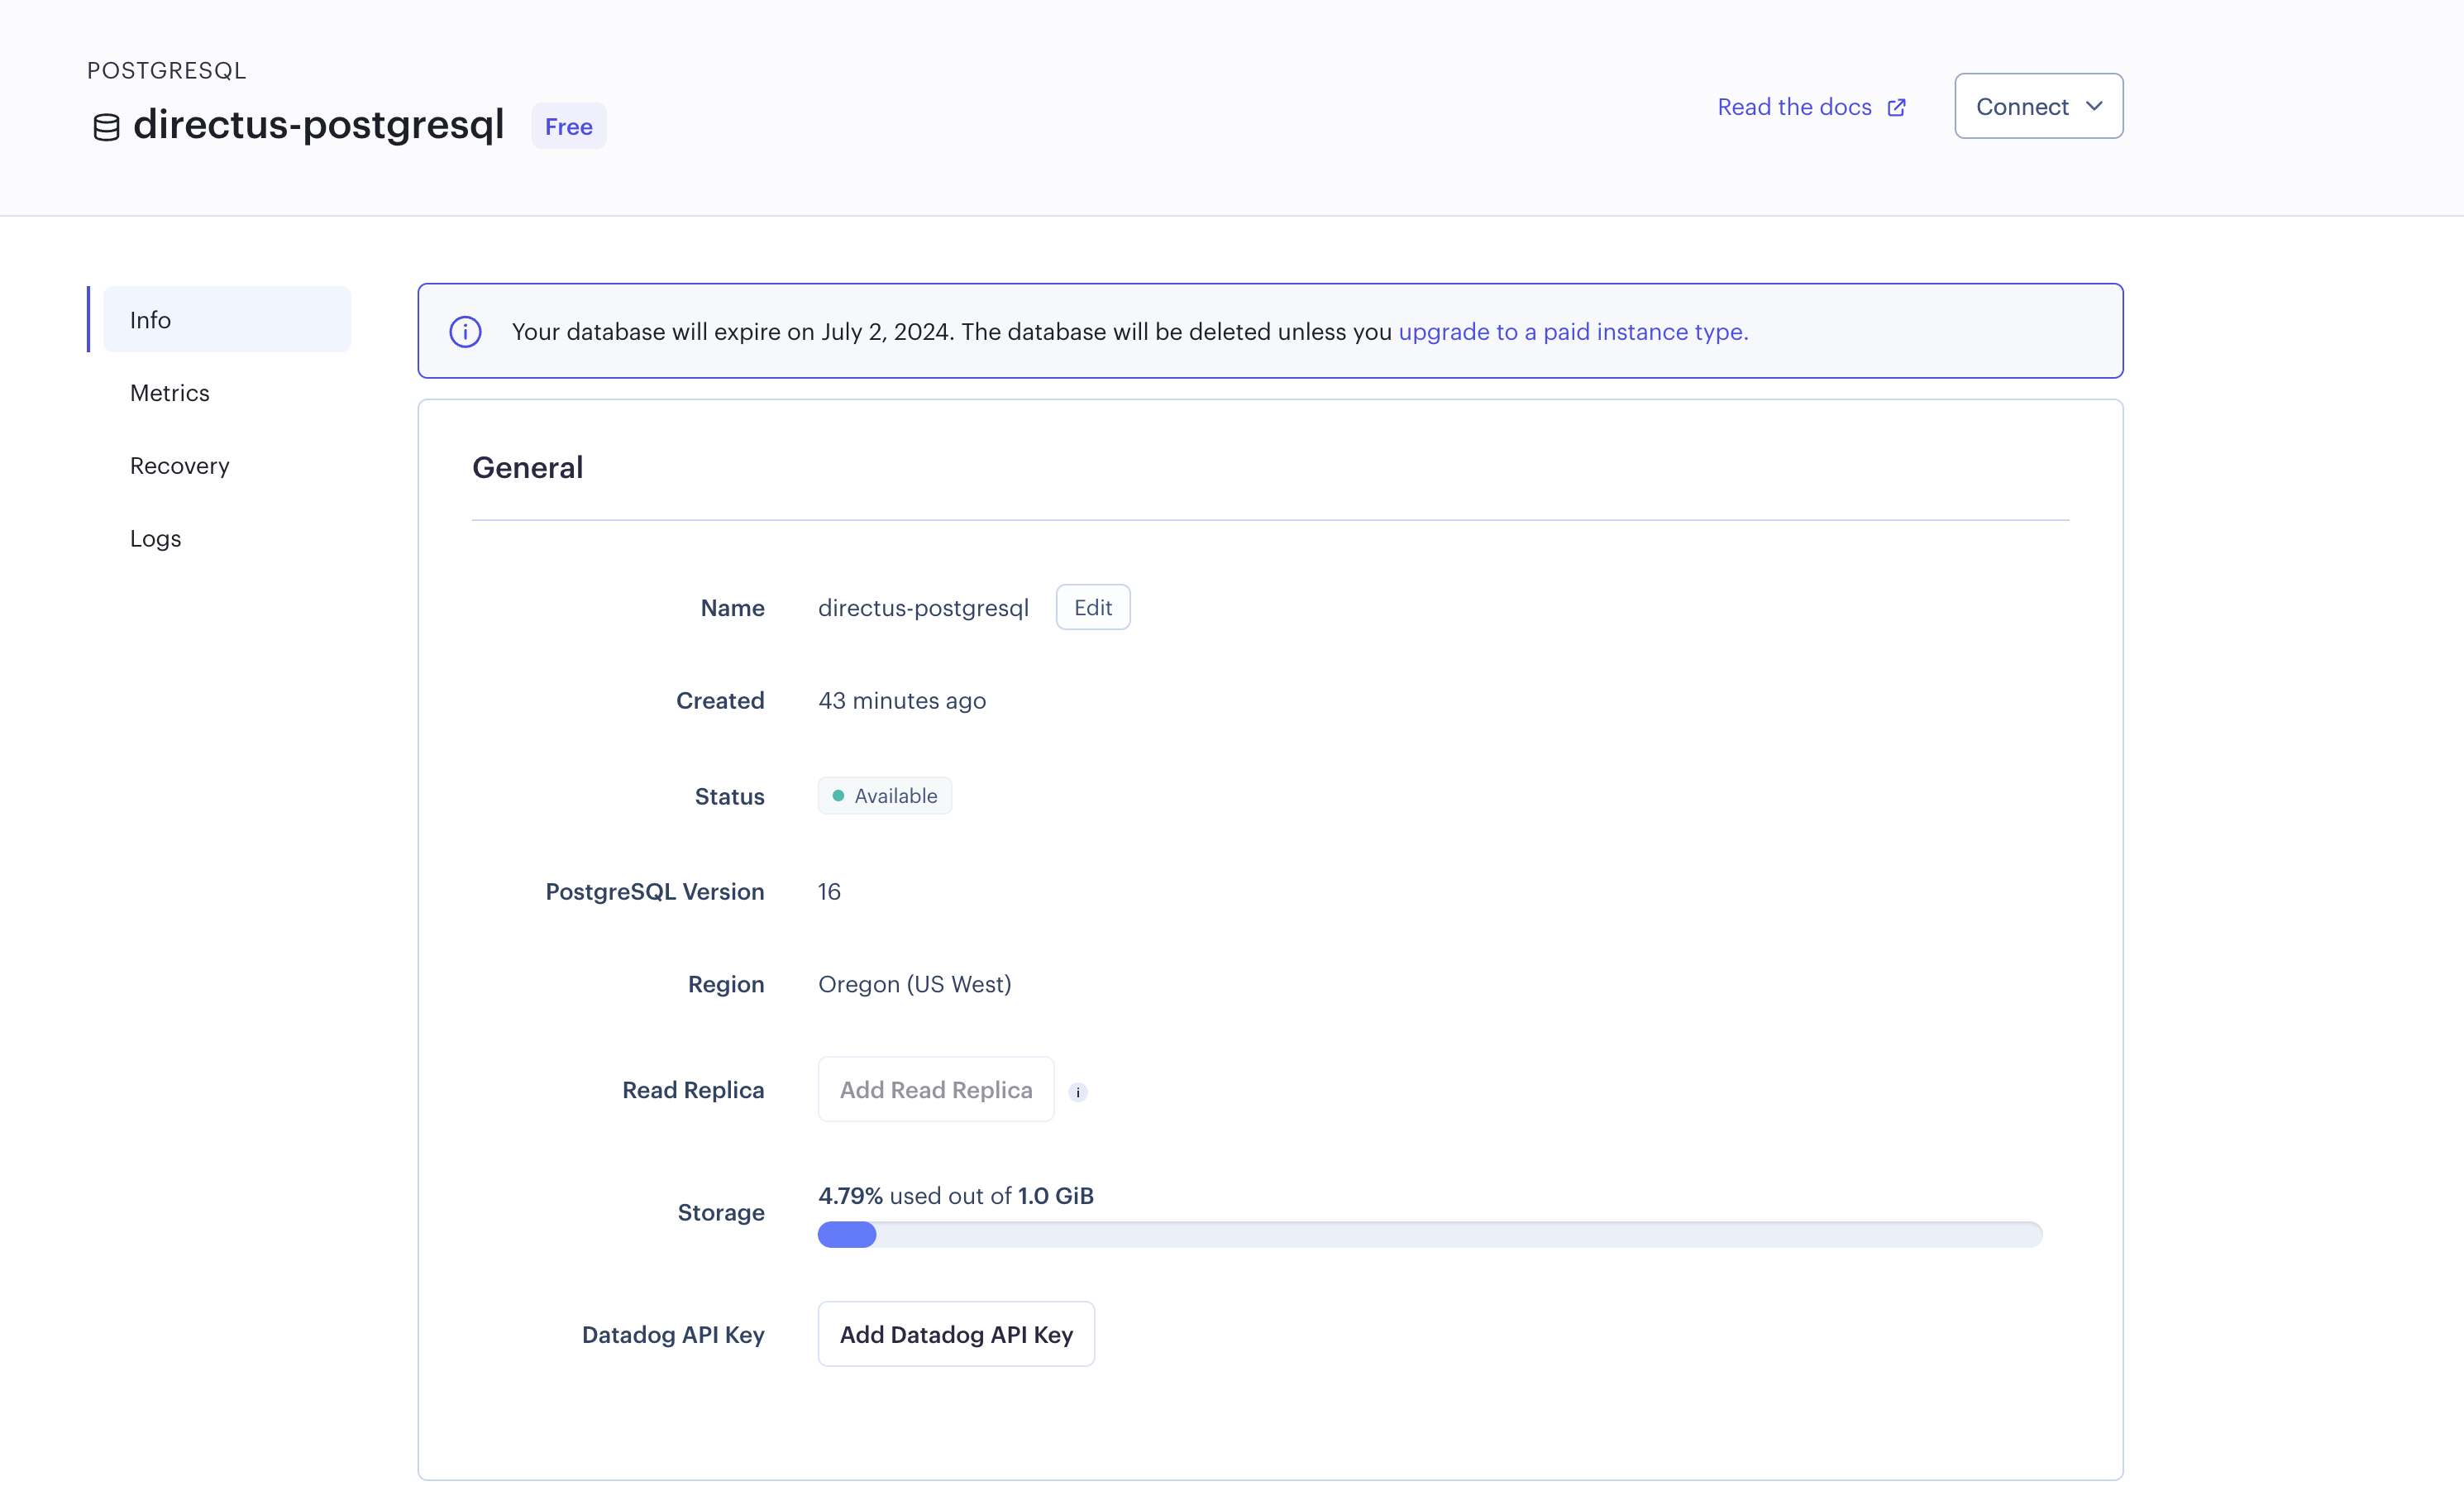
You can scroll down to the Connections tab to find the credentials needed to communicate with the database you created.
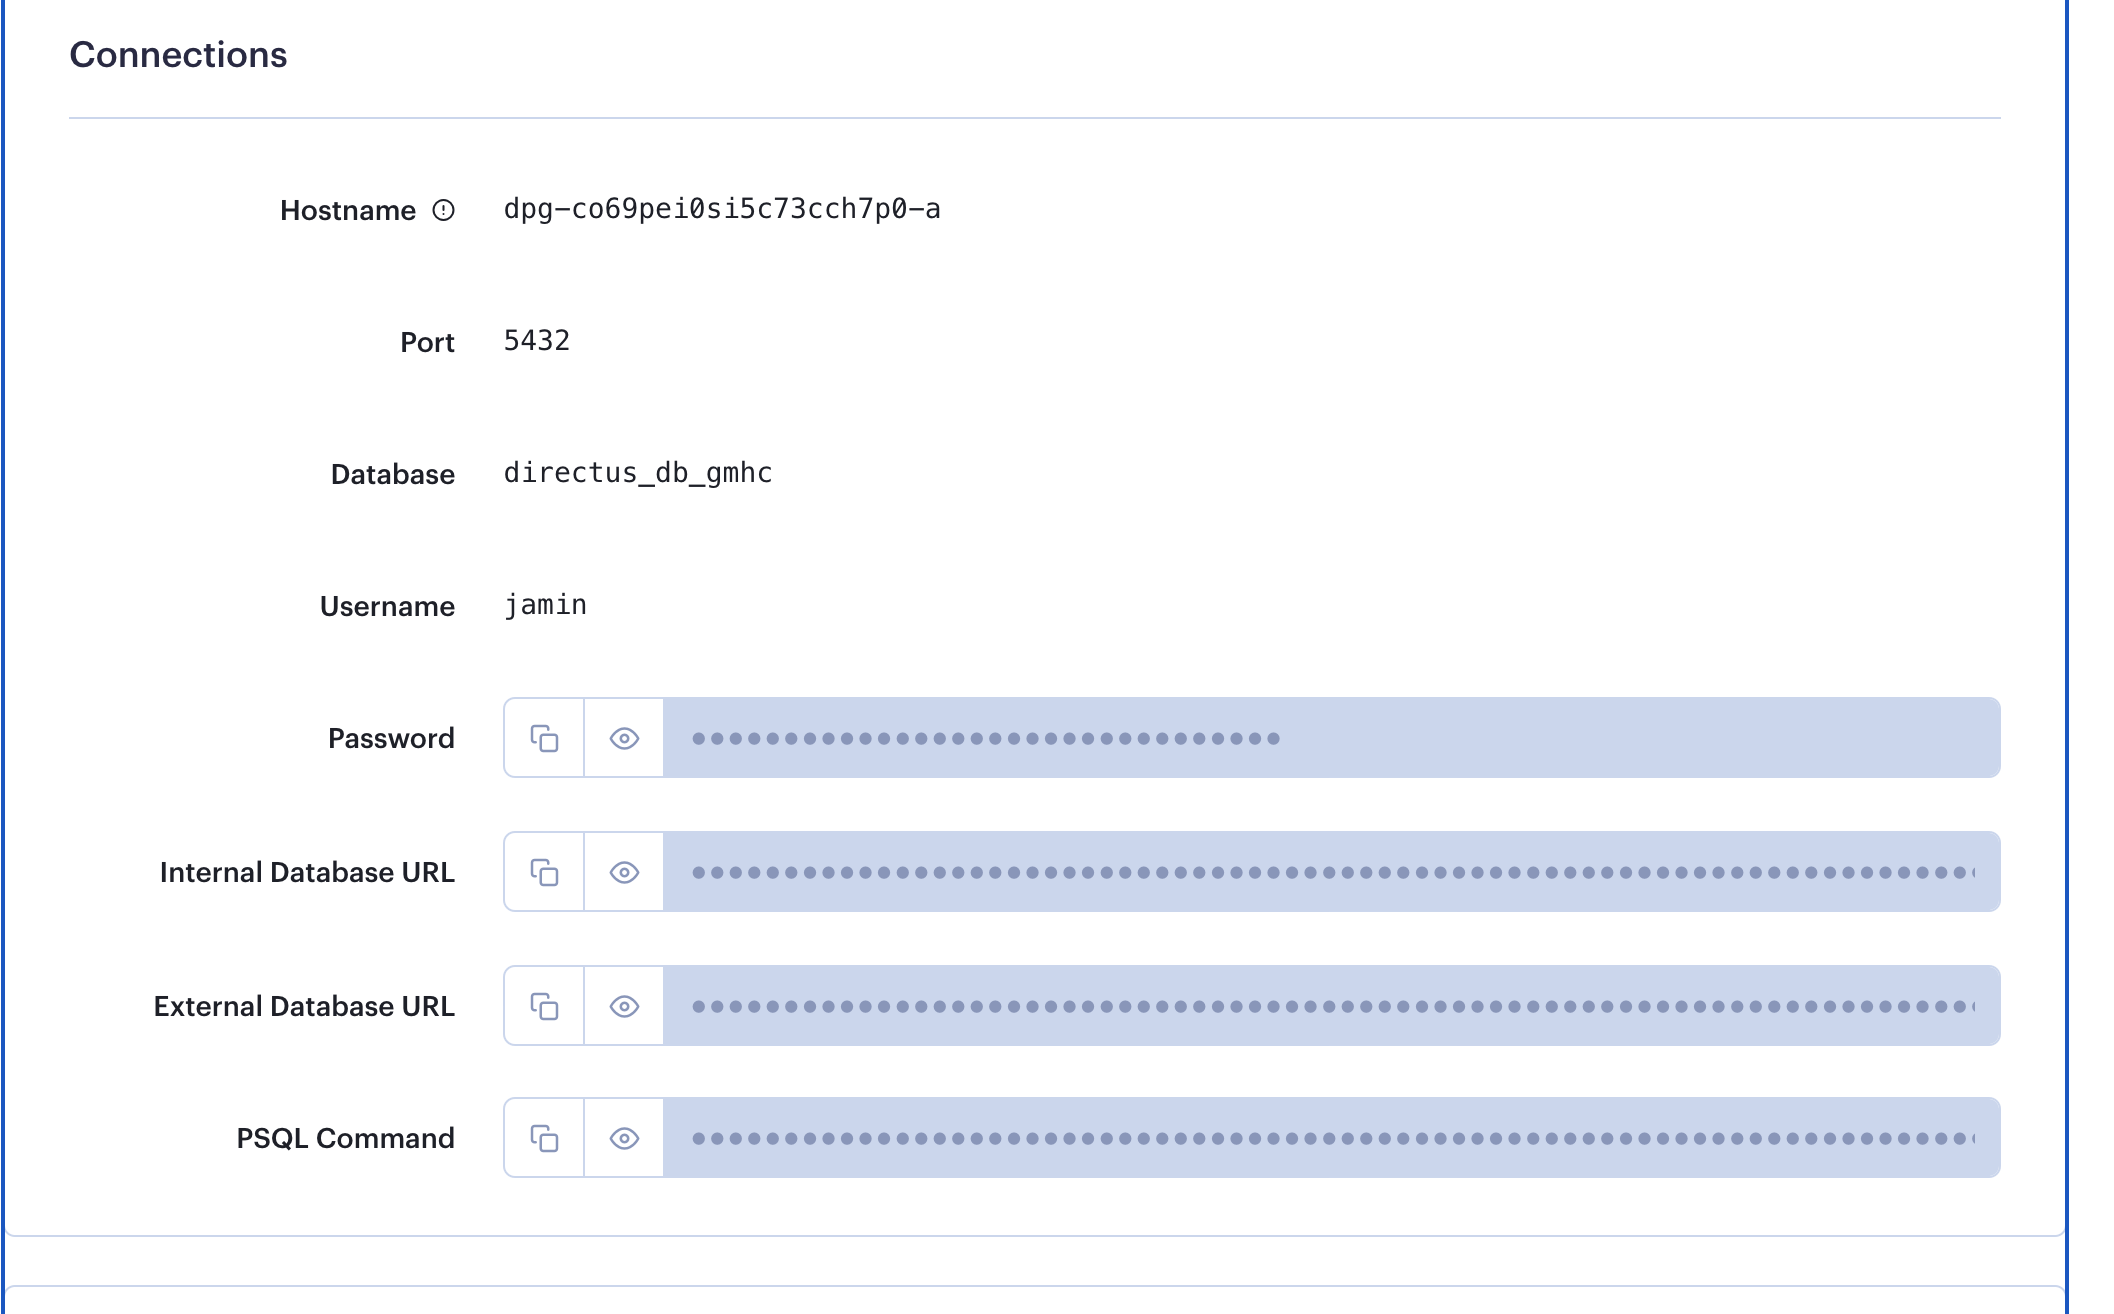
Copy the hostname, port, database, username, and password and save them, as you’ll need them when creating an instance of Directus later in the next step of this tutorial:
Step 2: Deploy an Instance of Directus from Docker Hub
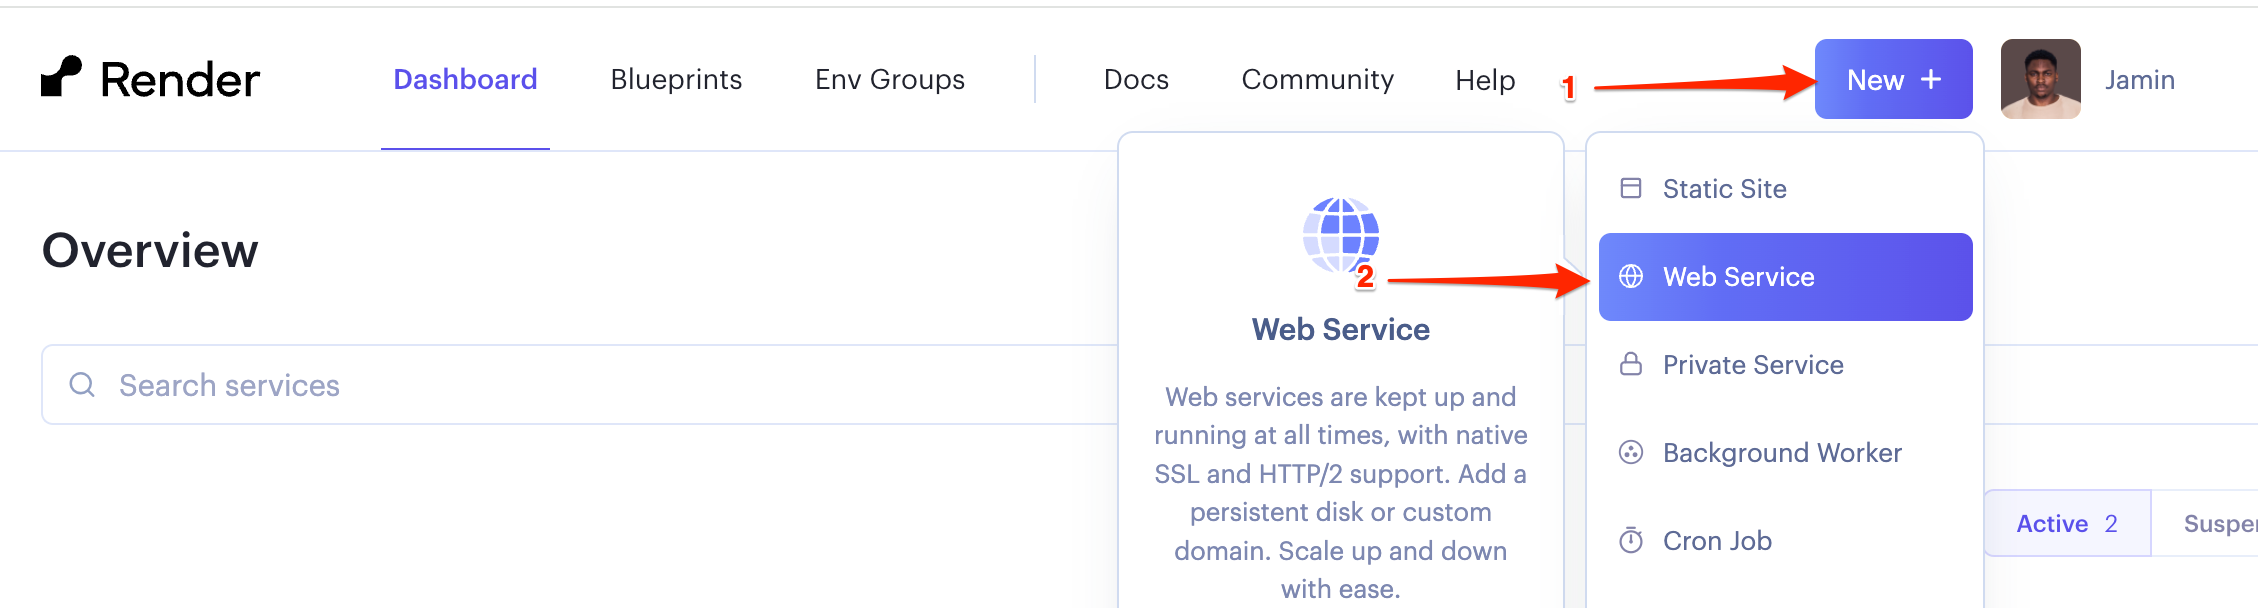
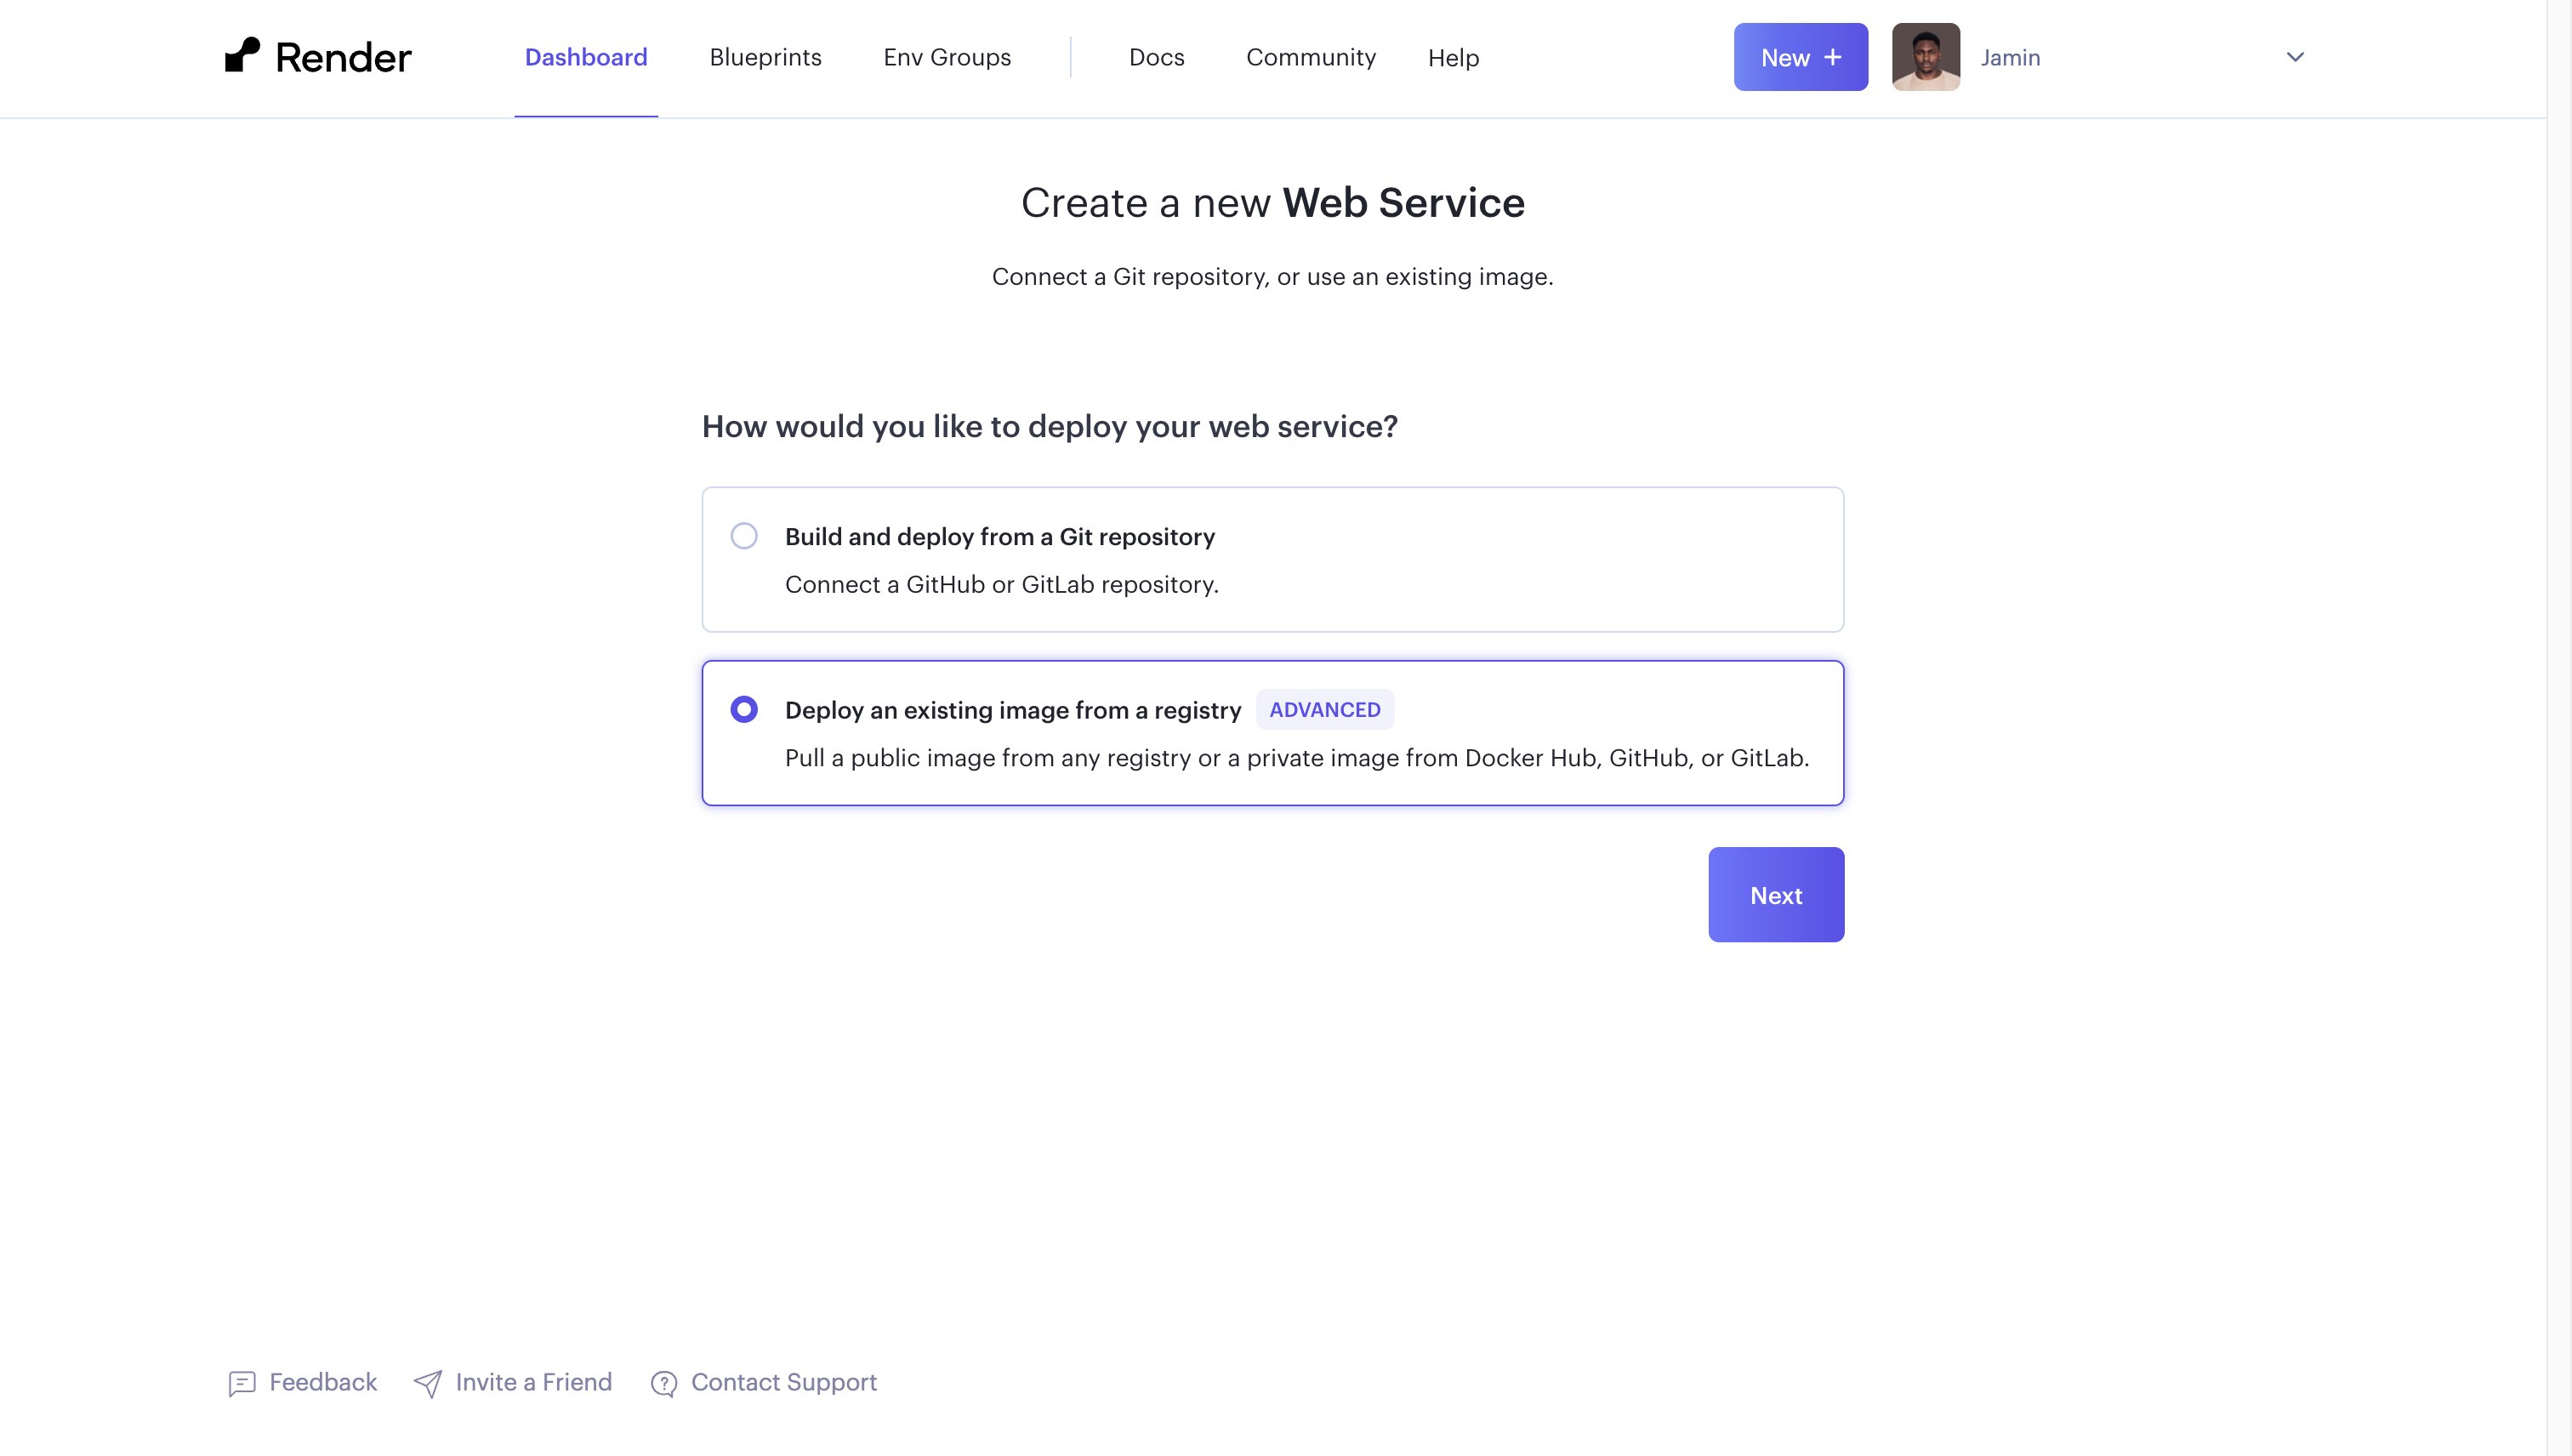
On your Render.com account, click on the “New +” button and Click on “Web Service” to create a new web service
Select the second option on the “How would you like to deploy your web service?” page, then click next.
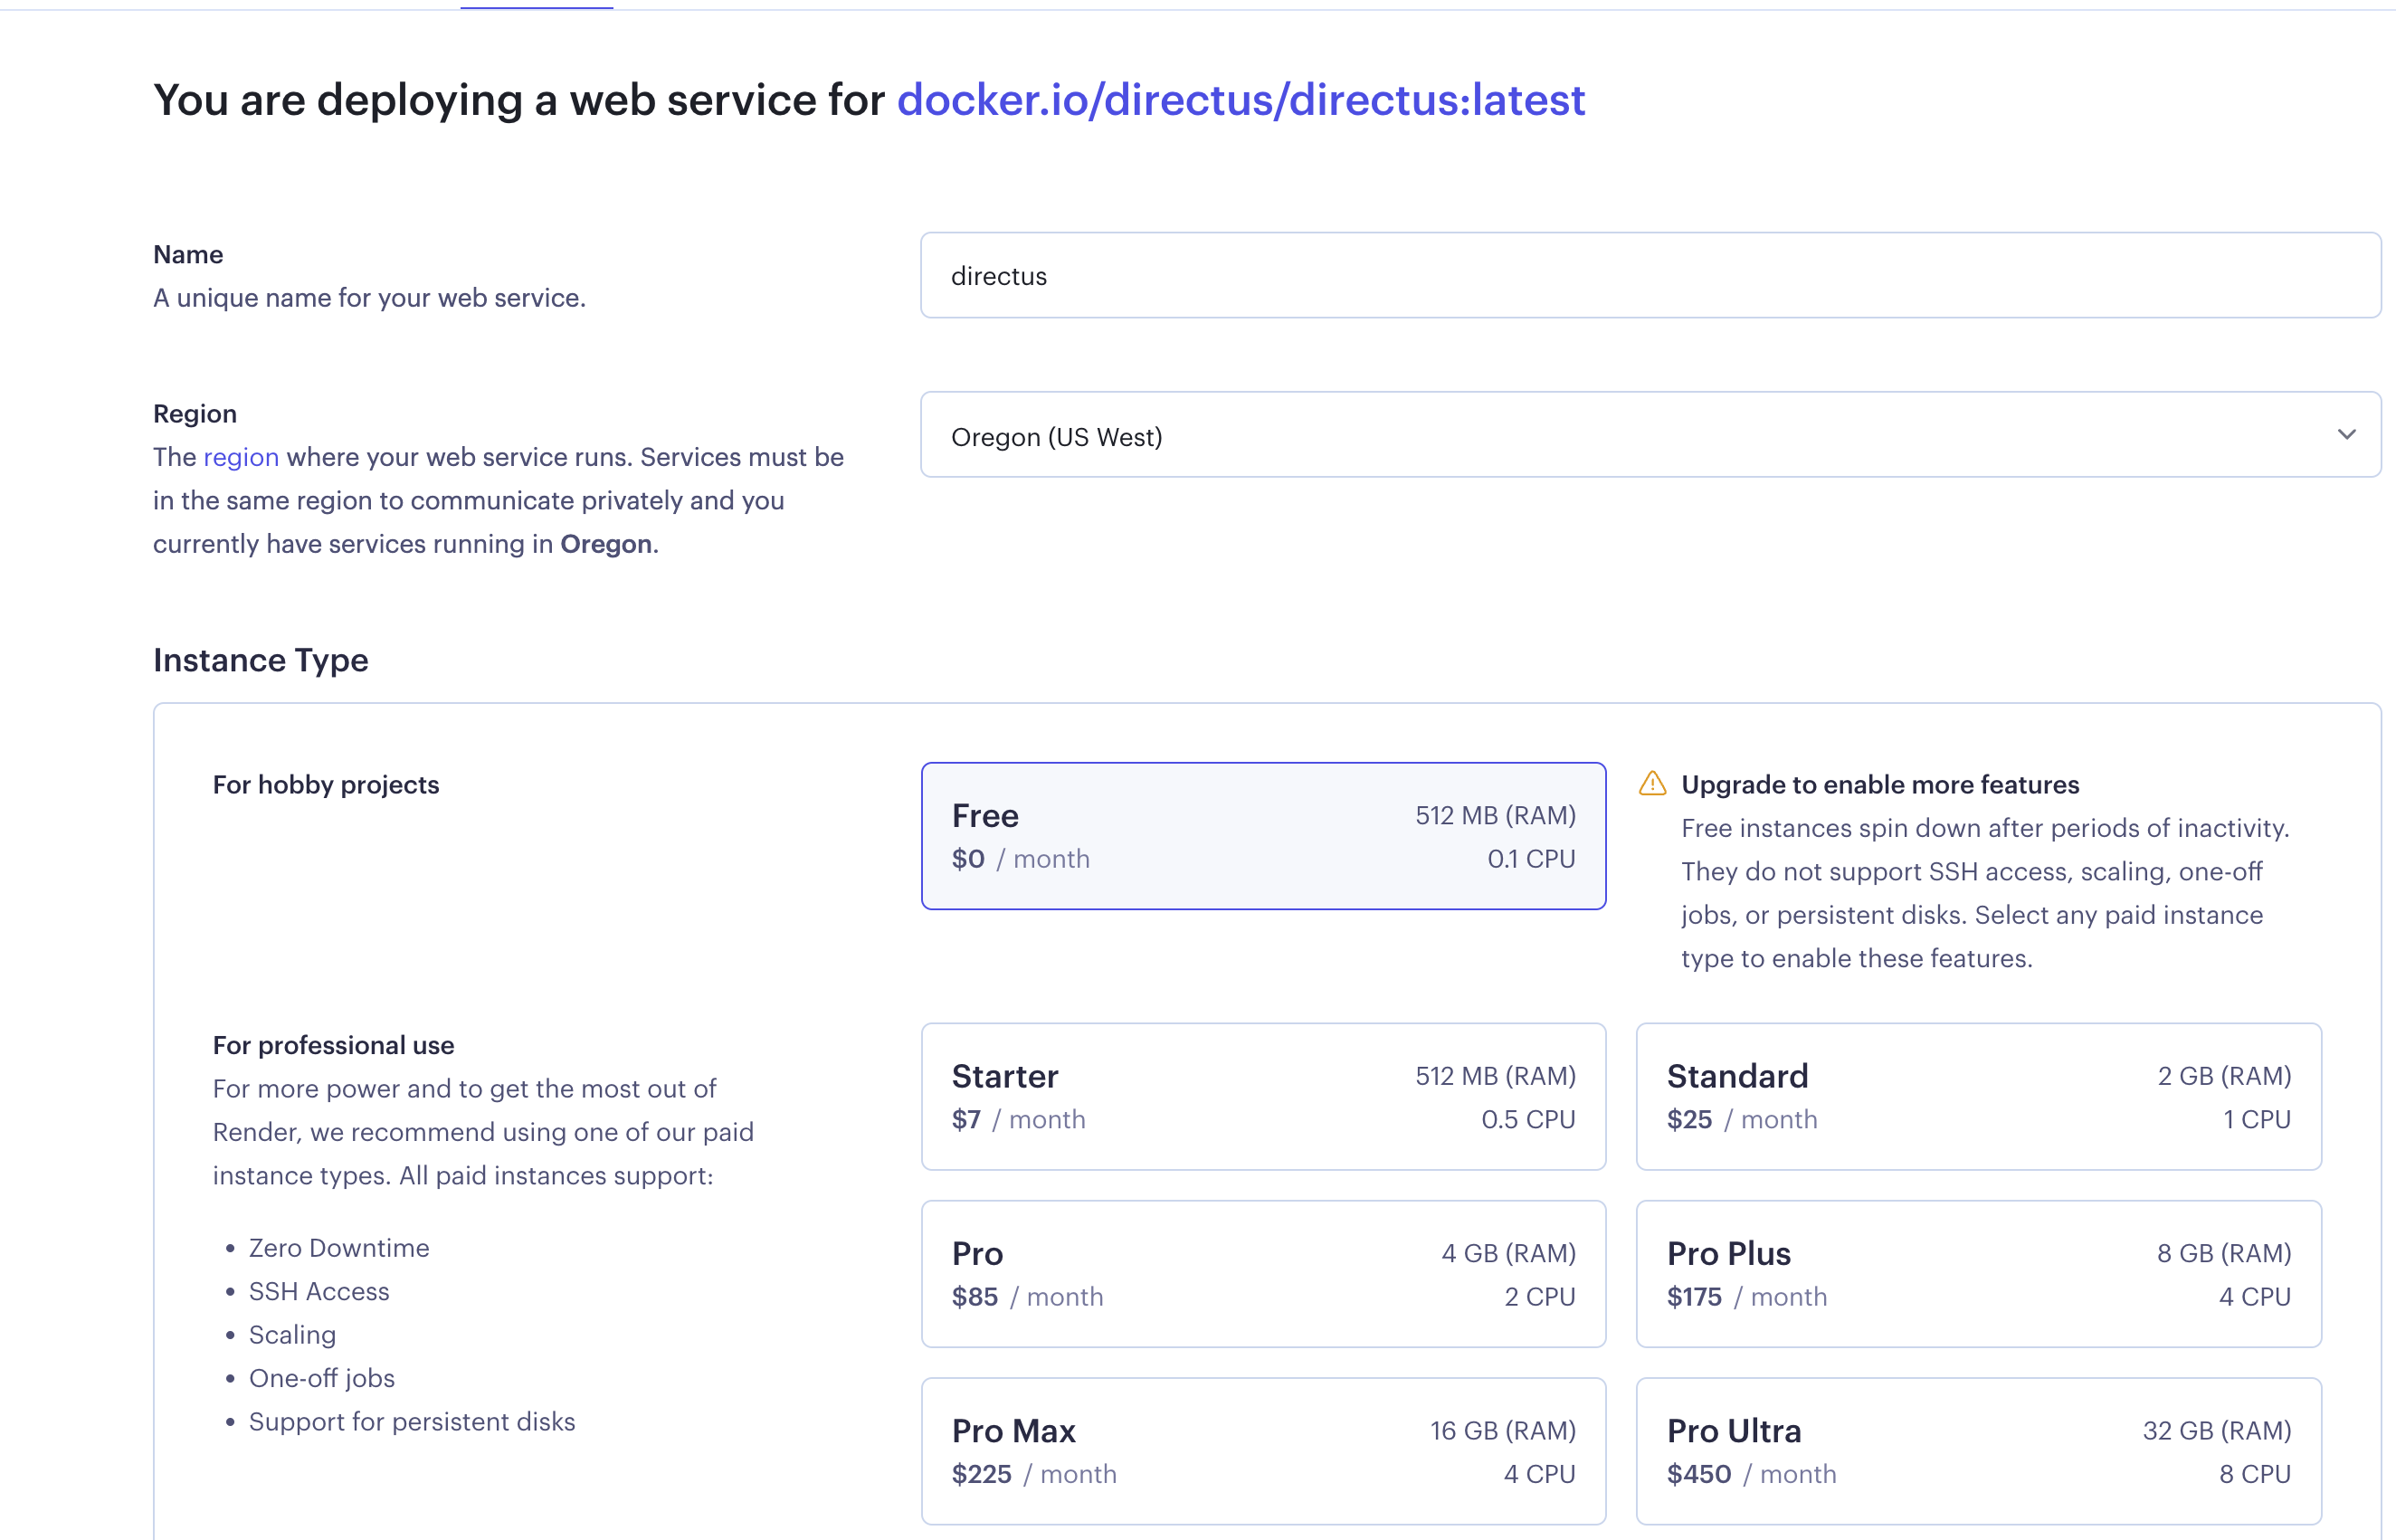
The next page will ask you for the image URL you want to deploy. Paste the official Directus URL from the Docker hub below into the input field, and click on next:
https://hub.docker.com/r/directus/directus
On the web service creation page, you can add your preferred name for your web service and the region where you want the web service to run; also, select the For Hobby Projects as the Instance Type plan.
On the Environment Variables tab, add the following variables to set up the Directus instance:
ADMIN_EMAIL = admin@example.com
ADMIN_PASSWORD = d1r3ctu5
DB_CLIENT = postgres
DB_DATABASE = YOUR_DB_NAME_FROM_STEP_1
DB_HOST = YOUR_DB_HOSTNAME_FROM_STEP_1
DB_PASSWORD = YOUR_DB_PASSWORD_FROM_STEP_1
DB_PORT = 5432
DB_USER = YOUR_DB_USER_FROM_STEP_1
KEY = YOUR_RANDOM_KEY
SECRET = YOUR_RANDOM_SECRET
WEBSOCKETS_ENABLED = true
Click on the “Create Web Service” button, and this will deploy a new instance of Directus as a web service for you.
After deployment, you will be redirected to the web service page with all the details about your web service. Click on the live URL of your web service, and it should open Directus in a new tab.

Congratulations! 🥳 you’ve just deployed an instance of Directus on Render and connected it to a PostgreSQL database.
Summary
In this article, you successfully created a PostgreSQL instance and deployed Directus to Render.com; some possible next steps you can take to improve your deployment might include setting up autoscaling to handle large incoming requests on your Directus application and enabling cron jobs to run backups for your application. (This involves upgrading to a paid account on Render 😉).
Directus also has a Directus Cloud version that offers constant backups, rolling updates, round-the-clock monitoring, and the ability to restart automatically in the event of a crash.
I hope this article is helpful to you.
Happy coding!🍻


